

Installing Ubuntu on VirtualBox: A Step-by-Step Guide for Beginners
Hey guys! Are you ready to dive into the world of virtual machines and explore the wonders of Ubuntu on your existing system? Well, you’ve landed just at the right spot! In this guide, we’ll take you through the step-by-step process of installing Ubuntu on VirtualBox, making it super easy for you to follow along, even if you're not a tech wizard. So, buckle up and let's get started!
Why Install Ubuntu on VirtualBox?
Before we dive into the nitty-gritty details, let's address the big question: Why would someone want to install Ubuntu on VirtualBox in the first place?
- Testing and Development: If you’re a developer or someone interested in testing new applications, having a virtual environment can be super helpful.
- Learning: New to Linux? VirtualBox allows you to tinker with Ubuntu without messing up your primary OS.
- Convenience: Run multiple operating systems simultaneously without the need for dual-booting.
- Safety: Try out Ubuntu’s features and software without risking your main environment.
With those awesome reasons in mind, let’s move to the exciting part!
What You'll Need Before You Start
Alright, so before you hit the ground running, make sure you have all the tools in your toolkit:
- VirtualBox installed on your system: You can download it from VirtualBox official site.
- Ubuntu ISO file: Grab the latest one from the Ubuntu website.
- A stable internet connection: To ensure smooth downloading and installation.
Got everything? Perfect! Now let's move on.
Download and Install VirtualBox
Step 1: Download VirtualBox
- Head over to the VirtualBox official website.
- Choose the correct version for your operating system (Windows, MacOS, or Linux).
Step 2: Install VirtualBox
- Open the installer file.
- Follow the installation wizard, and accept the default settings unless you need specific custom setups.
- Once installed, open VirtualBox from your applications menu.
Setting Up a New Virtual Machine in VirtualBox
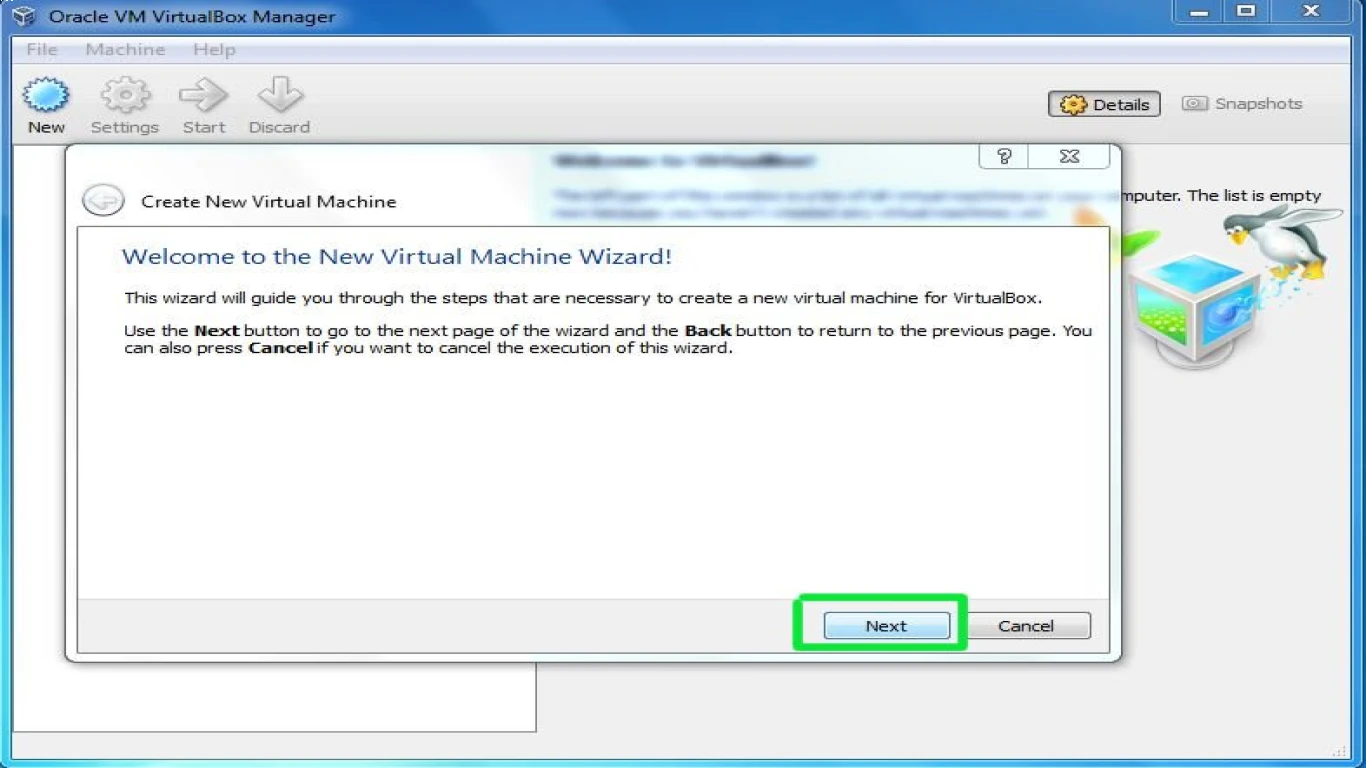
Step 3: Create a New Virtual Machine
- Open VirtualBox and click on the “New” button.
- Enter a name for your virtual machine. It's totally cool to just go with "Ubuntu."
- Under Type, select "Linux," and for Version, choose "Ubuntu (64-bit)".
Step 4: Allocate Memory Size
- Decide how much RAM you’d like to allocate to the virtual machine. If you’re chill with 2GB, go with 2048 MB—it works great!
- Make sure it's not excessively high; you still need RAM for your actual OS.
Setting Up Virtual Hard Disk in VirtualBox
Step 5: Create a Virtual Hard Disk
- When prompted, select “Create a virtual hard disk now.”
- For Hard disk file type, stick with VDI (VirtualBox Disk Image).
- Choose “Dynamically allocated” so it uses space as needed on your machine.
Step 6: Allocate Disk Size
- Allocate a minimum of 25GB. This will hold your system and allow for additional installations.
Installing Ubuntu on Your Virtual Machine
Step 7: Insert the Ubuntu ISO
- Go to the settings of your newly created VM.
- Under the Storage section, click on the empty disk icon and select “Choose a disk file.”
- Navigate to and select the Ubuntu ISO you downloaded earlier.
Step 8: Boot Up and Install
- Start the VM by clicking Start in VirtualBox.
- Follow the Ubuntu installation guide, which ensures a seamless experience with its straightforward steps.
- Select “Install Ubuntu” when prompted.
Step 9: Set Up Ubuntu
- Choose your keyboard layout and language.
- Opt for a Normal Installation and check the option to install third-party software for graphics and WiFi support.
- Let it do its magic—it'll install everything it needs.
Post-Installation Setup of Ubuntu on VirtualBox
Step 10: Complete the Installation
- Once the installation finishes, restart your Virtual Machine.
- Remove the disk image when you’re prompted to prevent it from booting back into the installer.
Step 11: Set Up Your Account
- Create your username and set up a password.
- You’re in control now! Feel free to explore Ubuntu’s interface, install apps, and customize to your heart's content.
Troubleshooting Common Issues
Issue 1: Can’t Use Full-Screen Mode
- Solution: Install Guest Additions on your VM via the Devices menu in VirtualBox for optimal display and performance.
Issue 2: Slow Performance
- Solution: Double-check your allocated resources or switch to Lightweight Desktop Environments inside Ubuntu.
Conclusion: Enjoy the Ubuntu Experience on VirtualBox
Congratulations! You've successfully installed Ubuntu on VirtualBox. You've opened the door to a whole new world of learning and development without leaving the comfort of your main OS. Whether you’re using Ubuntu for development, learning, or just out of curiosity, VirtualBox provides a safe environment to get you started.
FAQs
-
Do I need a powerful computer to run Ubuntu on VirtualBox?
- Not necessarily. However, more RAM and disk space will improve performance.
-
Is it possible to install Ubuntu alongside another Linux distro on VirtualBox?
- Yes, you can run multiple virtual machines, each with its OS, on VirtualBox.
-
Can I copy files between my main OS and the virtual Ubuntu?
- Absolutely! Installing VirtualBox Guest Additions allows you to set up shared folders.
-
Why does my Virtual Machine run slowly?
- Check your system’s available resources and adjust the VM settings accordingly.
-
What's the difference between an ISO file and a bootable USB?
- An ISO is a digital image file; a bootable USB is a physical medium you can use to install an OS.
Now that you’re all set, go ahead and enjoy the journey with Ubuntu! Let us know how your installation went and what cool things you plan on doing with it. Happy experimenting!